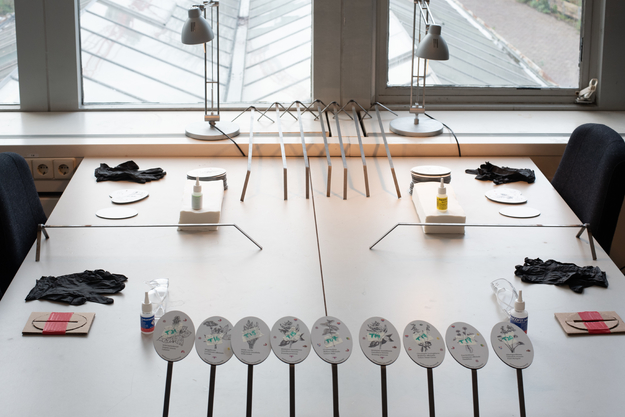
Materials
- Rubber gloves
- Safety masks
- Paper towels
- Acetone
- Yellow sand paper
- Red triangular sand paper
- Pencil
- Drill bit (3.4mm, make sure it's Cobalt Drill bits, like these)
- Poprivet gun
- Poprivets ( sleeve diameter = 3.2 mm, sleeve length 10 mm)
- Square hard plastic sealant scraper
- An empty Albert Heijn box
- Plant signs
- Metal sticks
Step 1: Clean the signs and the metal sticks before gluing.
Sanding the metal sticks
- Sand the bent part of each rod, firstly with the yellow sandpaper and then with the red sandpaper.
- Pass a towel on the metal sign to take the metal dust off.
Note: put your mask and your gloves on for the rest of the process!
Cleaning the metal sticks and the signs
- Fold a paper towel on its longer side in three.
- Put some acetone on the paper towel.
- Wipe down the smaller bent part once, in one direction.
- Unfold the towel once, wipe again, in the same direction.
- Unfold the towel one last time, wipe again.
- Once the metal stick is wiped down, put it on the table, the longer part on the table and the (clean) smaller part laying out in the air.
Repeat the same cleaning technique for the sign.
Step 2: Drill a hole in the sign and the metal stick
1. Drill Hole in metal stick
- Make sure you use the big standing drill to avoid breaking drill bits
- Loosen drill clamp using lever
- Place drill bit in hole
- Tighten drill bit using lever
- Make sure to put on safety goggles and gloves
- Turn on drill and make sure drill bit is correctly aligned with where the hole should be on the bent portion of the rod
- Drill speed
- Drill should be on highest speed
- (photo)
- Requires intense and consistent pressure
- If the settings are all correct, it should not take very long to drill the hole ( about 10 seconds). Make sure that the drill bit is sharp and there are no shavings around
- Do not touch the hole area, it will be hot.
2. Drill hole in sign
- Make sure the hole aligns properly with the hole in the metal stick
Step 3: Glue the sign
1.Add a generous layer of glue to the metal stick but not too much around the area with the hole.
2.Place the washer over the hole.
3. Place the sign onto the stick and make sure the sign, the stick, and the washer are aligned so that the pop rivet can go through.
4. Make sure the edges of the metal stick are fully sealed with glue.
5. Hold sign and stick together for a few minutes.
Step 4: Poprivet!
Using the poprivet is pretty fun and not very complicated. To see more about how to use pop rivets, look here.
1. Place the pop rivet in the pop rivet gun
- Thin side of the poprivet goes into the gun
- Thick side of the poprivet goes into the sign and stick
2. Pres the handles of the gun until you hear a pop and the thin part of the pop rivet cuts of and falls out of the gun.
3. Press the handles of the gun until you hear a pop and the thin part of the pop rivet falls out
4. Maintain a bit of pressure onto the sign so it stays in place.
5. Wipe away the excess glue on the back of the sign.
Step 4: Let Dry


