Introduction
Mycelium is the vegetative part of a fungus, consisting of a mass of branching, thread-like hyphae. The mass of hyphae can form a solid structure when growing on lignocellulosic materials as chopped straw or seed husks (oat, rice or barley husks, cottonseed or buckwheat hulls), also woody biomass. The dimitic or trimitic hyphae of the basiodiomycete fungi as reishi (Ganoderma sp.) or oysters (Pleurotus spp.) guarantees a strong natural binding of the bulk particles used as substrate for the mycelium growing.
This biomaterial has proven to be a perfect eco-friendly replacement for plastic foams used on packaging (Styrofoam) and eventually could be used in structural insulation, solving many negative impacts on the environment. Obviously, the mycelium pieces are 100% biodegradable.
The mycelium of dried basidiomycetes is highly combustible, the fire retardant properties of this new kind of biomaterial regards the bulking agents used for make the substrate where the mycelium grows, rather than the fungus itself. The agricultural by-products such as grain husks and hulls have a naturally high silica content that prevents the product from burning rapidly.
Studies made by companies as Ecovative Design show that the mycelium insulates behave similarly to lumber. In case of flood, the mycelium-based insulation materials absorb less than 8% of water by mass, while maintaining structural integrity.
Firsts results available by clicking here.
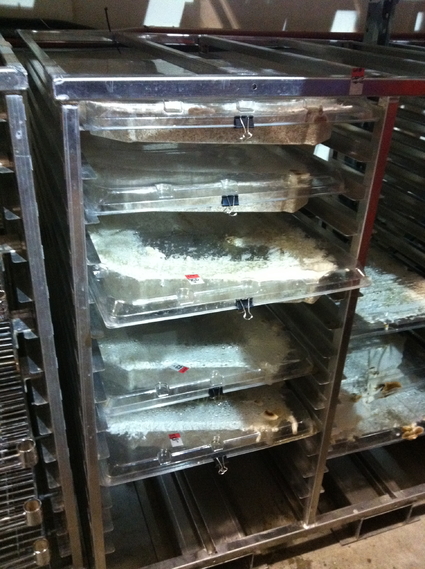
Ecovative Sample Materials - Sample molds and packaging materials on the shelves at Ecovative.

Fungiculture methods
The species to be grown and tested are Ganoderma lucidum (#GLBS01) and Pleurotus ostreatus "Sylver" (#POSY01). The codes recall the Medimatic's Mycelium Stock numeration.
Two methods of inoculation should be tested; liquid spawn and grain spawn.
Liquid culture preparation
Isolated strains of both species have to be grown in liquid culture (LC) media containing 4% of dextrose and 5% of multi-cereal broth. The LC should be incubated without necessity of stirring during 1 week prior to use. Afterwards, this liquid inoculum is sucked into 60 ml syringes and injected on the final substrates. If not used, all the already-grown cultures should be kept under refrigeration at 4ºC.
Grain spawn preparation
Rye grains should be soaked in cold water during 12h prior to sterilization, after rinse the water away, 0.5% of CaCO3 should be added and mixed thoroughly. A pH 6 is desirable. CaCO3 also prevents grain aggregation. Addition of wheat bran is not needed. The rehydrated cereal is introduced in polypropylene (PP) grow bags equipped with air micro-filters. Later on, the bags should be partially closed with a heat impulse sealer. A little aperture in one of the upper corners is needed for further inoculation with a liquid culture syringe. The grain bags should be sterilized for 1h 30' at 121ºC and 15 psi prior to inoculation. If not used, all the already-grown spawn bags should be kept under refrigeration at 4ºC.
Alternative grains could be millet or sorghum.
Substrate preparation
Two options are contemplated, one is to inoculate the substrate directly installed into pre-made moulds, the second option is to inoculate bags of bulk substrate that should be broke up and blown to pieces after 1 week of incubation, afterwards the pieces are transferred to the moulds where the mycelium could reassemble its mass. For the substrate preparation we will use wheat husks, calcium carbonate CaCO3 (0.5%) and water. A supportive matrix made out of burlap cloth will be used to improve the mechanical properties of the material. Two heat treatments should be compared; sterilization in autoclave at 121 °C (250 °F) at 100 kPa (15 psi) during 1h 30' and bulk pasteurization in pots at 60-70º during 2h.
Koen marvellous hands (he is still single, girls) - Wheat husks for mushroom cultivation

Inoculation with liquid spawn
After the autoclave is cold to the touch it should be placed on the banch of the cleanroom. Afterwards, the bags are moved out and placed on the clean surface, an alcohol lamp (or lighter) and the mycelium syringe should be ready. The syringe should be shaken to break up the mycelium clumps. After put away the cover of the needle it should be heated over the flame until glowing red for proper sterilization. Following this, the bags are open at the edge and the needle is introduced on the aperture for inoculation. The mycelium suspension should be inoculated towards the inner bag surface. The operator should see a small flow running down the inner surface of the bag towards the bottom. Each bag should be inoculated equally. 20 ml of liquid culture (LC) should be enough to inoculate 2 litres of bulk substrate. The bags should be closed and heat-sealed immediatly after inoculation. Shaking the substrate bags could improve the distribution of the inoculum.
Inoculation with grain spawn
Open your spawn bag (or jar) and taking your sterile utensil of preference, break up the grains ready to transfer. Open the grow bag, mould or tablet with the desired substrate to be inoculated. Transfer 1-2 spoons of the grain spawn and spread it over the substrate. Quickly, close again the bag with the impulse sealer. Finally, shake carefully the sample for disperse the grain spawn throughout the substrate and place it on a shaded shelf within the incubator.
**
All the protocols described above should be performed under sterile conditions.
On every operation, spray down the clean room walls with a 1:20 ratio (5%) of bleach to water. Make sure you have showered and are wearing clean clothes. Clean your hands with antibacterial soap or wear sterile gloves. A face mask and hair cap will also help reduce contamination.
**
Incubation
The inoculated bags are grown at adequate temperature and time for each species.
•Pleurotus ostreatus - Room temperature: 20-22 °C, substrate temperature: 25-30 °C, duration: 19- 22 days.
•Ganoderma lucidum - Room temperature: 23 °C, substrate temperature: 25 °C, duration: 18-20 days.

A portable mycelium incubator has been build by our team, the inner temperature and humidity can be regulated and monitored with digital controllers.
Drying the mycelium
In order to avoid allergic reactions due to spore inhalation and enhance its preservation, the mycelium its rendered inert by drying it in an oven. Successful drying depends on heat, air dryness and good air circulation. An industrial-size oven should be used reaching temperatures between 60 and 80ºC. Only healthy and fully-colonized substrates should be processed at this point. Pre-treat the mycelium pieces could be interesting in order to avoid bacterial development or colour changes on surface. Traditional pretreatments for drying fruit or mushrooms consist on dipping in an ascorbic acid, citric acid, lemon juice or sodium metabisulfite solution. Other several methods can be used, this should be explored further. When dry, the mycelium has to be allowed to condition for 4 to 10 days before installation.
DRYING TRAYS
Good air circulation without reaction between the mycelium pieces and trays is most important. For small amounts of mycelium and trial runs, cheesecloth or synthetic curtain netting stretched over oven racks, cake racks, broiler racks or cookie sheets could work well. As we want to dry large quantities of mycelium it is better to use shallow wooden, plastic or metalic trays with slatted, perforated or woven bottoms.
If preparing our own trays, do not use galvanized screening for tray bottoms. It has been treated with zinc and cadmium, which can cause a harmful reaction when in contact with acid pretreated samples. Other metals such as aluminium also are not advisable because they may discolour and corrode with use. If used, line with cheesecloth or synthetic curtain netting to keep food from touching the metal. A liner also helps keep mycelium from sticking to trays and prevents pieces of substrate from falling through.
Wash trays in hot, sudsy water with a stiff brush. Rinse in alcohol and air dry thoroughly before and after each use. A light coat of fresh vegetable oil or nonstick substance helps protect wood slats and makes cleaning easier.
If trays are used in the oven, they should be 4 or 5 cm smaller in length and width than the oven dimensions to allow for good air circulation. When stacking trays, place blocks of wood 5 cm or higher between trays.
DRYING METHODS
The mycelium pieces should be arranged on drying trays in single layers, pit cavity up, at 60°C in an oven or dehydrator. The length of time needed to dry mycelium will depend on the size of the pieces being dried, humidity and the amount of air circulation in the dehydrator or oven. Obviously, thinner slices and smaller pieces will dry more quickly than larger, thicker pieces or massive bricks. Also, mycelium will generally dry more quickly in convection ovens or electric dehydrators than in conventional ovens. At a drying temperature of 60º C, about 6 hours are required to dry thin mycelium slices or 24 hours for hard bricks. If possible, the large pieces should be stirred and turned over every 3 to 4 hours during the drying period. Could also be good to turn the power off when drying is almost complete and open the door wide for an additional hour before removing pieces.
TESTING FOR DRYNESS
The mycelium should be dried enough to stop it growing and prevent a microbial invasion and subsequent spoilage. Dried mycelium should be leathery and pliable. After conditioning, little pieces of mycelium should be squeezed. No moisture should be left on the hand and pieces should spring apart when released.
POST-DRYING TREATMENTS OR CONDITIONING
When drying is complete, some pieces will be moister than others due to their size and placement during drying. Conditioning is a process used to evenly distribute the minimal residual moisture throughout all pieces. This reduces the chance of spoilage, especially from mold. To condition, place cooled, dried mycelium loosely in large plastic or glass containers, about two-thirds full. Lightly cover and store in a warm, dry, well-ventilated place for four or 5 days. Stir or shake containers daily to separate pieces. If beads of moisture form inside, return the mycelium to drying trays for further drying, then repeat the conditioning step.
USE OF PRESERVATIVES
Ecofriendly and biodegradable neem seed oil has been found to be safe and cost effective insect repellent. Warmed and fluidized neem seed oil can be painted on insect-affected mycelium pieces, sprayed on crops or dropped at the floor-base of the insect tunnels.
There are other preservatives, such as a borate solution, which can be applied directly to the mycelium surface. Borides or borates are natural waterborne preservatives that have been used for centuries to protect lumber.
Experimental testing protocols
Mechanical testing
TENSILE RESPONSE
Subjects a sample to uniaxial tension until it fails. Element tensile testing capabilities include: wedge tensile testing, axial tensile testing, weld tensile testing, castings tensile testing, elevated temperature tensile, tensile testing for assembled pieces, full-size tensile testing and yield tensiles, plus heat treatment capabilities.
PROOF LOAD TESTING
Is often used interchangeably with yield strength; it refers to the tension-applied load that a test sample must support without evidence of deformation. Proof load testing can also be done on assembled pieces. Methods include: tension testing, compression testing.
MECHANICAL STRENGTH RELATED WITH THE MOISTURE CONTENT
To be described.
Sound insulation testing
Acoustic testing or sound insulation testing, is the measurement of how much sound is stopped by separating walls made out of any tested material. By making a controlled noise on one side of the separating wall or floor and measuring how much sound is being received on the other side, we can tell how much sound is stopped by the structure.
Accelerated Weathering Testing
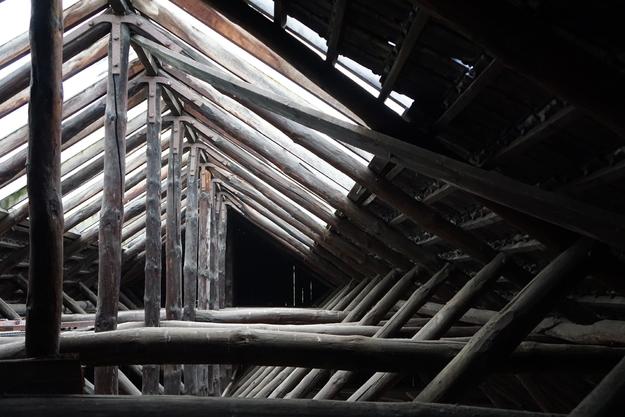
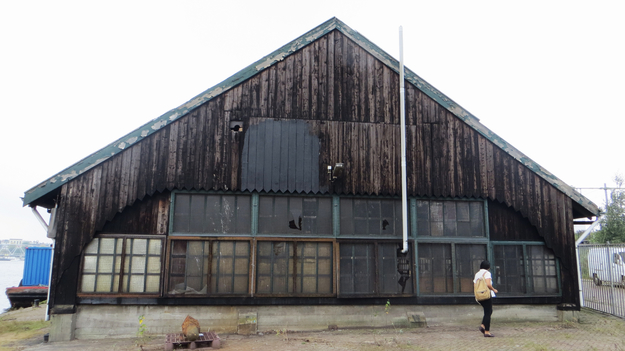
Ultraviolet radiation, temperature, and moisture are the factors that contribute to material degradation for products exposed to the elements. Our mycelium-based insulation biomaterial is going to be used in the interior of an old wooden barn exposed to the weathering effect, so it is important for our team to understand the durability and expected lifespan of the biomaterial.
Accelerated weathering is the simulation of all these conditions using special environmental chambers and instruments in order to accelerate the weathering process and measure its effects on the pieces.
EFFECTS OF WEATHERING ON MATERIALS
Some effects of weathering on materials includes haze, colour change, decomposition (or rotting), as well as effects on physical properties like mechanical strength.
BENEFITS OF ENVIRONMENTAL EXPOSURE TESTING
Accelerated weathering testing is required to ensure that the biomaterial developed on this project meets regulatory standards. Some of these standards include:
•Salt Spray (Fog) testing
•Water Fog testing
•Bioresistance testing.
•Acetic-Acid-Salt Spray (Fog) testing
•UV Exposure testing
Optical Microscopy analysis
Optical microscopy allows small features of a sample to be analysed in detail. The laboratories routinely use a range of microscopes for initial examination and characterisation to plan the next steps for work or to confirm observations prior to proceeding to more detailed investigations by other laboratory techniques such as SEM/EDX or reverse engineering.
Scanning Electron Microscopy analysis
The scanning electron microscope (SEM) uses a focused beam of high-energy electrons to generate a variety of signals at the surface of solid specimens. The signals that derive from electron-sample interactions reveal information about the sample including external morphology (texture), chemical composition, and crystalline structure and orientation of materials making up the sample. In most applications, data are collected over a selected area of the surface of the sample, and a 2-dimensional image is generated that displays spatial variations in these properties. Areas ranging from approximately 1 cm to 5 microns in width can be imaged in a scanning mode using conventional SEM techniques (magnification ranging from 20X to approximately 30,000X, spatial resolution of 50 to 100 nm).


